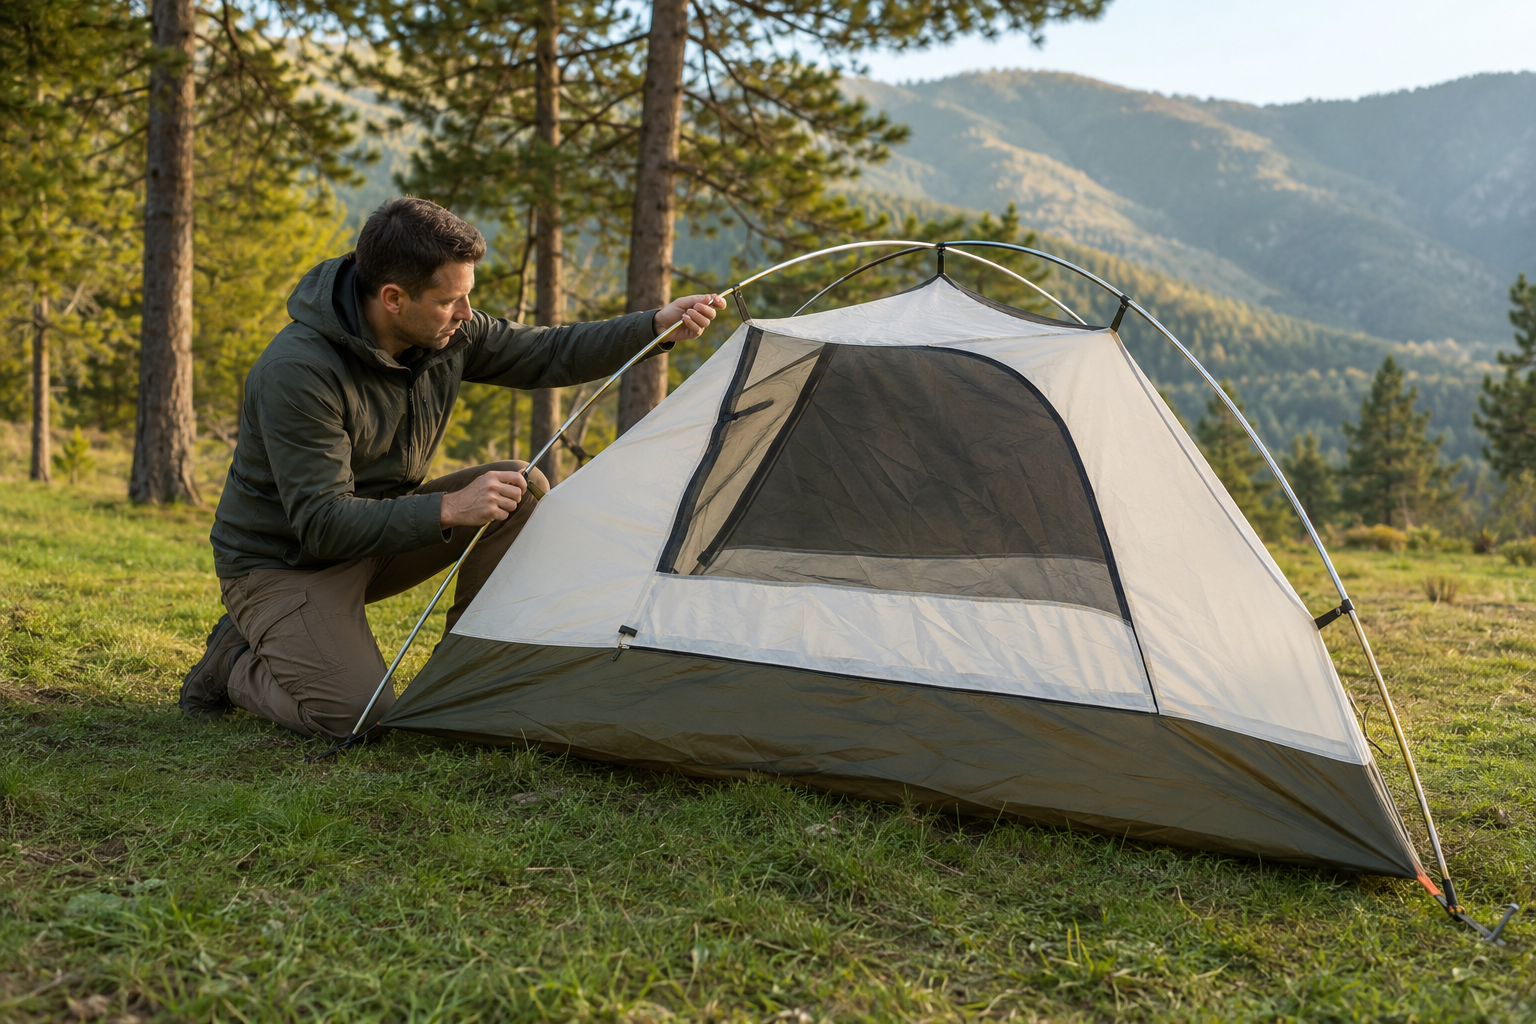
Setting up a tent can feel confusing when you are new to camping. There are poles to connect, clips to attach, corners to secure, and a rainfly that must face the correct direction. Fortunately, dome tents are designed to be simple, stable, and relatively quick to assemble.
This practical tutorial explains how to set up a dome tent from start to finish. By learning the correct sequence, beginners can avoid tangled poles, loose fabric, poor ventilation, and unstable pegs.
Step 1: Learn the Basic Parts of a Dome Tent
Before leaving home, open the tent package and identify every component. A standard dome tent usually includes the tent body, a rainfly, two flexible poles, pegs, guy lines, and a storage bag.
The tent body forms the main sleeping area. Mesh panels provide ventilation, while the waterproof floor helps keep moisture away from your sleeping equipment.
The poles create the curved dome structure. They are usually made from aluminum or fiberglass sections connected by elastic cord. When unfolded, the sections naturally pull together to form long poles.
Pegs secure the tent corners to the ground. Guy lines provide extra stability in wind, while the rainfly protects the inner tent from rain, condensation, and cold air.
One of the most useful beginner camping tips is to assemble the tent at home before your first trip. A practice session makes every component familiar and reveals whether anything is missing or damaged.
Step 2: Choose a Safe and Level Campsite
A quick setup begins with choosing the right location. Look for ground that is relatively flat, dry, and free from sharp objects. Avoid setting up directly beneath dead branches, unstable trees, or loose rocks.
Inspect the area for stones, sticks, thorns, pinecones, and exposed roots. Remove small objects that could damage the tent floor or make sleeping uncomfortable.
Do not pitch the tent in a depression where rainwater may collect. Even a waterproof tent can become uncomfortable when surrounded by standing water.
If possible, choose a naturally sheltered location with some protection from strong wind. However, avoid areas that are too enclosed because poor airflow can increase condensation inside the tent.
Check the direction of the wind before positioning the entrance. Facing the narrow or rear side of the tent toward the prevailing wind usually reduces pressure on the structure.
Step 3: Unpack and Organize Every Component
Place the tent bag on the chosen site and remove all components. Keep the pegs and smaller accessories together so they do not disappear into grass or leaves.
Unfold the tent body completely and position it with the floor facing downward. Confirm where the entrance is located before continuing. Ideally, the door should face away from strong wind and toward an open, convenient area.
Place the rainfly beside the tent rather than over it. You will install it after the main frame has been assembled.
Arrange the poles parallel to the tent body. This simple organization supports a fast tent setup because you will not waste time searching for parts during assembly.
Keep the storage bag in a secure place. Putting unused accessories inside it prevents lightweight objects from blowing away.
Step 4: Connect the Pole Sections Correctly
Take the first folded pole and gently extend it on the ground. Allow each segment to slide into the next connector without forcing it.
Repeat the process with the second pole. Most basic dome tents use two long poles of equal length. Some larger models may include an additional shorter pole for the entrance canopy or vestibule.
Never hold one end of a folded pole and shake it aggressively. Although this method may seem fast, the sections can strike nearby people, damage the elastic cord, or connect incorrectly.
Instead, begin from the center and work toward both ends. Check every joint to ensure each section is fully seated. A partially connected pole can crack under tension.
Learning how the sections fit together is an important part of understanding how to assemble a camping tent safely and efficiently.
Step 5: Arrange the Poles Across the Tent Body
Lay the two completed poles diagonally across the tent body so they form an “X.” The crossing point should sit near the center of the tent roof.
Depending on the tent design, the poles may slide through fabric sleeves or attach to external clips. Some tents combine both systems.
If your model uses sleeves, carefully push each pole through the appropriate sleeve. Pushing is better than pulling because pulling can separate the pole sections inside the fabric.
Move slowly when the pole reaches a curve or seam. Do not force it if you feel strong resistance. Check whether the pole has become caught in loose fabric before continuing.
If the tent uses clips, position the poles over the body first. The clips will be attached after the pole ends have been secured.
Step 6: Secure the Pole Ends and Raise the Frame
Insert one end of the first pole into the corner pin, eyelet, or socket provided by the tent manufacturer. Move to the opposite corner and gently bend the pole until its other end fits into place.
Repeat this process with the second pole. As the poles bend, the tent body will begin to rise into its recognizable dome shape.
Avoid bending a pole from its middle using sudden pressure. Guide the curve evenly along its entire length. This protects the connectors and reduces the risk of cracking a fiberglass section.
Once both poles are secured, attach the tent clips from the lower sections upward. If there is a central hook at the roof, connect it around the point where the poles cross.
The fabric should now be lifted evenly without appearing excessively stretched. This is the central stage in setting up a dome tent and becomes much faster after a few practice attempts.
Step 7: Align and Adjust the Tent Body
Walk around the assembled frame and inspect its shape. All corners should be evenly positioned, and the pole crossing should remain near the center of the roof.
Straighten twisted straps and confirm that every clip is attached to the correct pole. Open the door briefly to ensure the zipper moves without excessive tension.
If the zipper is difficult to operate, the tent may be stretched too tightly or positioned unevenly. Adjust the corners before installing the pegs.
Make sure the floor is spread smoothly. Small wrinkles are normal, but large folds may reduce usable sleeping space and allow water to collect beneath the tent.
This quick inspection only takes a minute and can prevent frustrating adjustments later.
Step 8: Peg the Corners in the Correct Sequence
Start with one corner of the tent and insert a peg through the corner loop. Move diagonally to the opposite corner, pull the floor gently until it is smooth, and install the second peg.
Secure the remaining two corners using the same method. Working diagonally helps maintain an even tent shape and prevents one side from becoming tighter than the other.
Drive each peg into the soil at an angle of approximately 45 degrees, with the top leaning away from the tent. This position gives the peg better resistance against tension.
Leave a small section of the peg visible so it can be removed later. Avoid hitting it completely below the ground surface.
Use a rubber mallet, the flat side of a camping tool, or firm hand pressure when the soil is soft. Do not use your foot because sideways pressure can bend the peg.
Correct pegging is essential for secure tent pitching, especially when weather conditions change during the night.
Step 9: Install the Rainfly
Identify the front and rear sides of the rainfly before placing it over the tent. Look for door openings, logos, ventilation panels, or buckles that match the tent body.
Lift the rainfly over the frame and center it carefully. Attach its corner buckles, hooks, or elastic loops to the corresponding points near the tent base.
Ensure the rainfly does not rest directly against the inner tent wherever possible. A small air gap encourages ventilation and helps reduce condensation.
Align the rainfly door with the main entrance. If the tent includes a vestibule, extend it fully before pegging its outer point.
A properly fitted rainfly should look balanced and moderately tensioned. It must not sag heavily, but it should not pull the frame out of shape.
Including this step in your regular camping shelter preparation protects sleeping bags and personal equipment when rain arrives unexpectedly.
Step 10: Attach and Tension the Guy Lines
Guy lines stabilize the tent by transferring wind pressure from the fabric to the ground. They are particularly important in exposed areas or during uncertain weather.
Locate the attachment points on the rainfly and extend each line away from the tent. Install the pegs far enough from the structure to create a useful pulling angle.
Tighten the adjusters until the rainfly becomes smooth. The lines should feel firm but not excessively tight. Too much tension can distort the frame, strain seams, and make the entrance difficult to close.
Position guy lines where people are unlikely to walk. Because thin cords can be difficult to see at night, use reflective lines or place visible items near the pegs.
Recheck the tension after several hours. Fabric and lines may loosen as temperatures change or after exposure to moisture.
Step 11: Check Ventilation and Weather Protection
Open the tent vents unless strong wind is driving rain directly through them. Good airflow releases moisture produced by breathing and reduces dampness on the interior walls.
Confirm that the rainfly covers all mesh sections designed for weather protection. Make sure no clothing, sleeping bag, or equipment is pressing the inner wall against the rainfly.
Check that the vestibule does not block the entrance zipper. Store wet boots and muddy equipment beneath it, but keep them away from the sleeping compartment.
If rain is expected, inspect the direction in which water will flow around the tent. Create no trenches because they can damage the campsite and cause erosion. Move the tent to better ground if the location appears vulnerable to flooding.
These simple checks are valuable first-time camping essentials that improve comfort without adding much setup time.
Step 12: Organize the Interior Efficiently
Place sleeping mats on the floor before bringing in loose equipment. The mats protect the tent base and help define the sleeping area.
Keep heavy objects away from mesh panels and tent walls. Pressure against damp fabric can transfer moisture into the interior.
Store frequently used items, such as a flashlight, water bottle, warm layer, and footwear, near the entrance. Keep sharp tools and cooking equipment outside the sleeping area.
Never cook inside a standard dome tent. Flames, heat, and carbon monoxide can create life-threatening hazards, even when the door appears partly open.
Close the mesh door whenever entering or leaving to prevent insects from getting inside. Use the internal storage pockets for small objects that would otherwise be difficult to find at night.
Common Dome Tent Setup Mistakes to Avoid
The most common mistake is installing the rainfly backward. Always identify its entrance and ventilation points before fastening the corners.
Another problem is forcing poles through sleeves. If a pole stops moving, inspect the obstruction instead of applying more pressure.
Beginners also tend to overtighten the tent. Excessive tension can damage stitching, bend poles, and place unnecessary stress on zippers.
Using too few pegs is another risky shortcut. A freestanding dome tent may remain upright without them in calm conditions, but a sudden gust can move or collapse an unsecured shelter.
Do not leave the rainfly packed away simply because the sky looks clear. Weather can change rapidly, while the rainfly also helps manage dew and cold wind.
How to Make Future Tent Setups Faster
Practice the complete sequence at home until you can recognize every component without checking instructions. Time yourself only after you can assemble the tent correctly and safely.
Pack the tent in reverse order. Place the items needed first—such as the footprint or tent body—where they can be removed easily.
Keep pegs in a separate, brightly colored bag. Clean soil from them after every trip so they are ready to use next time.
Fold or roll the poles carefully rather than mixing them with fabric. When breaking down the poles, begin near the center to reduce strain on the internal elastic cord.
Developing a consistent routine is the best approach to quick dome tent assembly. With practice, many beginners can reduce setup time significantly without rushing or damaging their equipment.
Final Tent Safety Inspection
Before settling in, walk around the entire tent one final time. Confirm that all pole sections are connected, every clip is attached, and the corners are securely pegged.
Check the rainfly alignment and make sure the guy lines are visible, balanced, and properly tensioned. Test the entrance zipper from both inside and outside.
Look overhead for changing hazards such as damaged branches. Inspect the surrounding ground for signs of water movement, insect nests, or unstable soil.
Knowing how to set up a dome tent is less about speed than following a reliable sequence. Once you consistently organize the parts, assemble the crossed frame, secure the corners, install the rainfly, and tension the guy lines, speed will naturally improve.
A carefully pitched dome tent provides a dry, stable, and comfortable base for the entire trip. Master the process at home, repeat it at the campsite, and you will be ready to build dependable shelter with confidence.