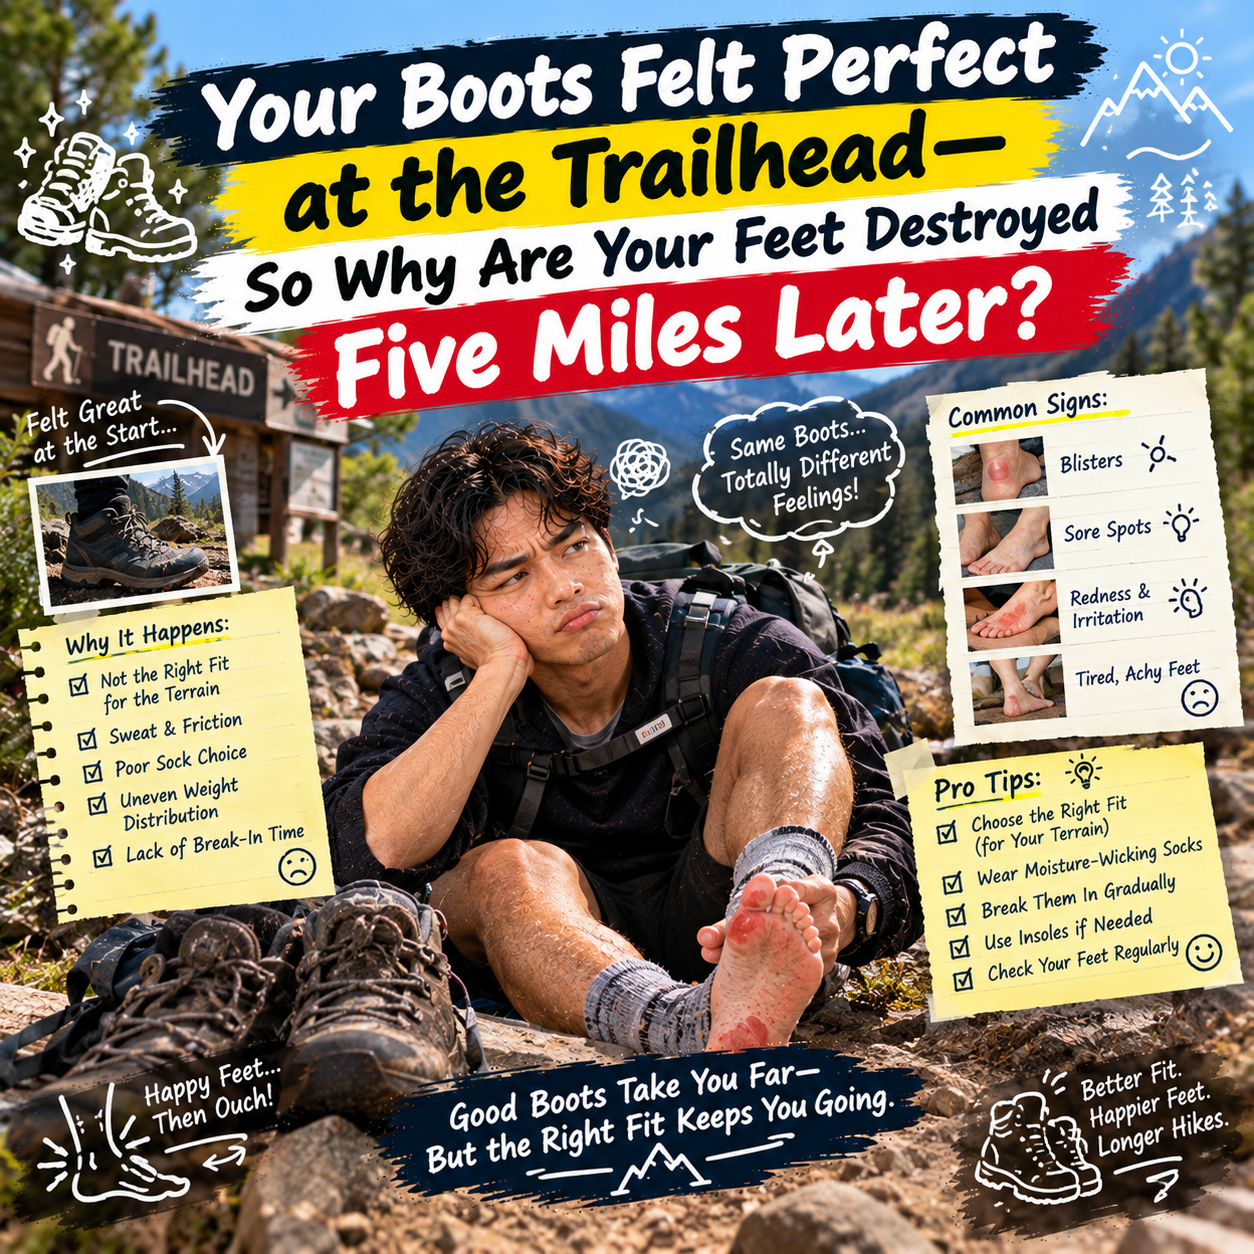
The first mile feels completely normal.
Your boots are comfortable.
Your socks feel fine.
Nothing hurts.
Then somewhere during the climb, you notice a tiny warm spot on the back of your heel.
It is not painful enough to stop.
So you keep walking.
Another mile passes.
The warmth becomes irritation.
Then burning.
Eventually every step feels like your sock is rubbing directly against raw skin.
You finally take your boot off.
There it is.
A blister.
Now the trailhead is several miles away, the route ahead is even longer, and something smaller than a coin has become the most important problem on the entire hike.
Blisters can feel unpredictable because the footwear that seemed perfectly comfortable at the beginning suddenly becomes painful later.
But they rarely appear without warning.
Good hiking blister prevention starts with understanding what happens during thousands of repeated steps—and learning to react while the problem is still a hot spot rather than waiting until the skin is already damaged.
A Blister Usually Starts Long Before You See It
Blisters are not created in one dramatic moment.
They develop through repeated movement.
Your foot moves.
Your sock moves.
Your shoe moves.
Skin experiences repeated mechanical stress in the same area.
Add heat and moisture, and the conditions can become increasingly favorable for irritation.
That means the first warning may not look like anything.
You simply feel warmth.
A slight burning sensation.
Tenderness.
A spot that suddenly becomes noticeable with every step.
That is the moment that matters.
The Hot Spot Is Your Early Warning System
A hot spot is exactly what it sounds like.
One small area begins feeling unusually warm or irritated.
Maybe it is your heel.
The side of your little toe.
The ball of your foot.
The top of a toe.
At this stage, you may still have no visible blister.
That is good.
You have caught the problem early.
Stop.
Take off the shoe.
Check your sock.
Inspect the skin.
Look for debris.
Adjust the lacing.
Address moisture.
Use appropriate blister-prevention tape or another method you know works for your feet.
Five minutes now can save hours of painful walking later.
“I’ll Fix It at the Next Break” Is Usually a Bad Bargain
The viewpoint is only twenty minutes away.
You tell yourself you will deal with the rubbing there.
But twenty minutes can represent thousands more repeated movements against the same irritated area.
The problem does not pause because your scheduled break is coming.
Once you notice a genuine hot spot, treat that as the break.
The mountain will wait.
Your skin is already giving you information.
Listen to it.
Footwear Fit Matters More Than the Logo
A premium hiking boot can still destroy your feet.
An inexpensive shoe can feel excellent if it happens to fit your foot properly and suits the terrain.
Brand reputation cannot solve poor fit.
People have different:
Foot widths.
Heel shapes.
Arch profiles.
Toe shapes.
Foot volumes.
Walking mechanics.
This is why another hiker’s perfect boot may be terrible for you.
The best hiking footwear is not universally the most expensive or technically impressive option.
It is footwear that fits your feet and performs appropriately for your intended use.
Your Heel Should Not Be Sliding Around
Imagine your heel moving slightly upward inside the boot with every step.
Once?
Nothing happens.
Now repeat that movement thousands of times.
That small amount of motion can create significant irritation.
Heel slip is one reason a boot that feels comfortable while standing in a store may behave differently during a long hike.
Walk in the footwear.
Use stairs or an incline when possible.
Pay attention to whether your heel remains reasonably secure.
Comfort while standing still tells you surprisingly little about hiking comfort.
Your Toes Need Room for the Descent
Uphill can hide footwear problems.
Then you start descending.
Your foot shifts forward.
Toes repeatedly contact the front of the shoe.
After a long descent, they hurt.
In more severe cases, hikers can develop damaged or blackened toenails.
Footwear should provide appropriate space for your toes without becoming so loose that the entire foot slides around.
That balance matters.
Secure does not mean crushed.
Roomy does not mean uncontrolled.
Feet Can Change During a Long Day
The shoe that feels spacious in the morning may feel noticeably tighter several hours later.
Feet can swell during prolonged activity.
Heat can contribute.
Long distances can contribute.
This is another reason footwear fit should not be judged only during a thirty-second try-on.
When possible, try hiking footwear with the socks you actually intend to wear.
Walk around.
Give your feet enough time to tell you what the fit really feels like.
Thick Socks Cannot Fix Shoes That Are Too Large
Your heel slips.
So you add thicker socks.
Maybe two thick pairs.
Now the shoe feels tighter.
Problem solved?
Not necessarily.
You may have reduced some empty volume while creating new pressure points and more heat.
Sock thickness should work with the footwear fit.
It should not be used as a desperate correction for fundamentally wrong sizing.
Start with the shoe.
Then build the sock system around it.
Socks Are Part of the Footwear System
Hiking socks are not simply normal socks with outdoor branding.
They influence moisture, friction, cushioning, fit, and temperature.
A sock that bunches creates potential pressure and rubbing.
A sock that stays saturated changes the environment around your skin.
A sock that is too thick can make otherwise well-fitting footwear too tight.
A sock that is too thin may change how securely your foot sits in the shoe.
Think about the shoe and sock together.
Cotton Can Become Uncomfortable Once It Is Wet
Cotton feels perfectly comfortable when dry.
The problem is that hiking feet sweat.
Weather may also introduce moisture.
Stream crossings happen.
Once cotton becomes wet, it can hold that moisture against the foot and dry relatively slowly.
For longer hikes, many hikers prefer wool blends or synthetic socks designed to manage moisture more effectively.
The objective is not buying the fanciest sock possible.
It is maintaining a comfortable environment around the foot.
Merino and Synthetic Socks Both Have a Place
Merino wool blends are popular because they can manage moisture while remaining comfortable across changing temperatures.
Synthetic hiking socks can also move moisture effectively and may dry quickly.
Neither automatically guarantees blister-free feet.
Fit still matters.
Footwear still matters.
Moisture still matters.
Your individual feet still matter.
Use materials as part of a system rather than expecting one fabric to solve every problem.
Sock Wrinkles Can Become Big Problems
You put your socks on quickly.
There is a small fold under your forefoot.
At home, you would barely notice.
After thousands of steps, that wrinkle can become extremely irritating.
Before putting on your footwear, smooth your socks.
Make sure the heel sits correctly.
Check that there are no uncomfortable folds around the toes.
This takes seconds.
Tiny irregularities become much more important when repeated pressure is involved.
Liner Socks Can Help Some Hikers
Some hikers use a thin liner sock underneath the primary hiking sock.
The idea is to allow some movement to occur between the sock layers rather than concentrating all friction against the skin.
This approach works well for some people.
Others prefer a single well-fitting hiking sock.
There is no need to wait until an important trip to discover which system your feet prefer.
Test it beforehand.
Moisture Changes Everything
Imagine two identical feet in identical shoes.
One stays relatively dry.
The other becomes soaked with sweat.
They may not respond the same way to repeated friction.
Moist skin can become more vulnerable to blister formation.
This is why hiking blister prevention is not only about eliminating movement.
Managing moisture matters too.
If your feet consistently become extremely sweaty, your sock and footwear choices deserve attention.
Waterproof Footwear Has a Trade-Off
Waterproof hiking boots sound like the obvious superior choice.
Keep water out.
Feet stay dry.
Except moisture can originate inside the shoe too.
Your feet sweat.
Highly weather-resistant footwear may breathe differently from lighter, more ventilated options.
In wet, cold, muddy, or snowy environments, waterproof footwear may be extremely useful.
In warm, dry conditions, some hikers prefer more breathable footwear.
There is no universal choice.
Match the shoe to the conditions.
Wet Feet Need Attention
Maybe rain enters your shoes.
Maybe you cross a stream.
Maybe sweat has saturated your socks.
If conditions allow, use a break to manage the moisture.
Remove footwear.
Let your feet air.
Change into dry socks if you have them and doing so makes sense for the rest of the hike.
Inspect known friction points.
A spare pair of socks weighs very little and can become surprisingly valuable.
Dry Socks Do Not Stay Useful If Your Shoes Are Full of Water
This seems obvious.
But imagine changing into your only dry pair while your footwear is still completely saturated.
A few minutes later, the new socks are wet too.
Consider the entire system.
Can the shoe drain?
Can it dry?
Are conditions continuing to soak your feet?
Would changing now actually help?
Sometimes the best moisture strategy depends on what happens next, not simply what feels best for the next five minutes.
Small Debris Can Feel Enormous After an Hour
A tiny grain of sand.
A small pebble.
A piece of dried vegetation.
At first, it is merely annoying.
Then repeated pressure turns it into a problem.
If something feels like it is inside your shoe, stop and remove it.
Do not keep walking while hoping it will move somewhere harmless.
It may.
Or it may spend the next three miles rubbing against exactly the same piece of skin.
Gaiters Can Help Keep Debris Out
On sandy, dusty, snowy, or loose terrain, gaiters can reduce the amount of debris entering footwear.
They are not necessary for every hike.
But if you frequently stop because stones, sand, or vegetation enter from the top of your shoes, gaiters may solve a real problem.
Gear is most useful when it addresses something that repeatedly happens to you.
Do not buy equipment simply because other hikers use it.
New Boots Need Testing Before the Big Trip
You bought new boots on Thursday.
Saturday is a twelve-mile hike.
Bad experiment.
Even footwear that ultimately works perfectly for you may feel different from your previous pair.
The shape is different.
Materials behave differently.
Lacing feels different.
Pressure points may appear in unexpected places.
Wear new footwear on shorter outings first.
Increase distance gradually.
Find problems somewhere you can easily turn around.
“Breaking In” Cannot Fix Fundamentally Bad Fit
This distinction matters.
Some footwear becomes more comfortable as materials flex and conform through use.
But breaking in should not mean enduring severe pain until your foot surrenders.
If the toe box crushes your toes, the shoe may simply be wrong.
If a seam creates severe pressure, more miles may not solve it.
If your heel moves excessively because the shoe shape does not suit your foot, suffering longer is not automatically the answer.
Break-in helps compatible footwear become familiar.
It cannot transform every poor fit into a good one.
Test Footwear on Hills, Not Just Flat Pavement
A shoe can feel fantastic during a flat neighborhood walk.
Then behave completely differently on a steep trail.
Uphill loads the foot differently.
Downhill encourages forward movement.
Side slopes create lateral pressure.
Uneven terrain changes how your foot moves inside the shoe.
If your future hikes involve elevation, test footwear on comparable terrain before relying on it for a major trip.
Lacing Is an Adjustment Tool
Many hikers tie their shoes the same way every time.
Tight everywhere.
Done.
But lacing can influence how securely different parts of the foot are held.
If your heel lifts, certain lacing approaches may improve heel retention.
If the forefoot feels compressed, the lower section may need different tension.
Your goal is not maximum tightness.
It is secure, comfortable control.
Too Tight Can Be as Bad as Too Loose
You feel movement.
So you pull every lace as hard as possible.
Now the foot cannot slide.
Unfortunately, it also feels compressed.
Pressure builds over the top of the foot.
Toes feel restricted.
Comfort disappears.
Proper lacing should secure the foot without creating unnecessary pressure.
Make small adjustments.
Then walk.
Your feet will tell you whether the change helped.
Re-Lace During the Hike When Conditions Change
The way footwear fits at mile one may not feel identical at mile eight.
Your feet may swell.
Socks may compress.
Terrain changes.
A long descent begins.
Take a moment to adjust lacing if necessary.
Hiking equipment is not something you configure once in the parking lot and never touch again.
Small adjustments throughout the day are normal.
Downhills Expose Footwear Problems Fast
Climbing often receives all the attention because it is physically exhausting.
But descents can be brutal on feet.
Gravity encourages the foot to slide forward.
Toes can hit the front.
Heels may move differently.
Long downhill sections repeat those forces thousands of times.
Before a major descent, check your footwear.
Are the laces secure?
Do your toes have room?
Is your heel controlled?
Is a hot spot already developing?
Solve small problems before gravity magnifies them.
Toenails Matter More Than You Think
Long toenails can repeatedly contact the front of the shoe, particularly on descents.
That can create discomfort and contribute to nail problems.
Basic foot preparation before a hike includes keeping nails reasonably trimmed.
Do not aggressively cut them immediately before leaving if doing so creates tender skin.
Like most hiking preparation, routine maintenance works better than last-minute overcorrection.
Calluses Are Not Automatically Invincible Armor
A little toughened skin can tolerate repeated use well.
But extremely thick calluses can develop their own pressure and friction problems.
They may crack.
Blisters can even form beneath heavily callused areas.
If you repeatedly experience problems around thick calluses, consider appropriate foot care rather than assuming harder skin is always better.
For persistent issues, professional guidance may be useful.
Know Your Personal Problem Areas
After several hikes, patterns emerge.
Maybe your right heel always becomes irritated.
Perhaps the little toe on your left foot rubs during descents.
Maybe the ball of your foot becomes uncomfortable after ten miles.
Those patterns are valuable information.
You can prepare known areas before the hike rather than waiting for the same problem to appear again.
Experience should improve your prevention strategy.
Pre-Taping Can Make Sense for Known Hot Spots
If one area reliably develops irritation, some hikers apply suitable tape before starting.
The idea is to protect the vulnerable area before repeated friction creates damage.
But tape must be applied properly.
Wrinkles can create new friction.
Edges can roll.
Adhesive can behave differently on sweaty skin.
Practice your taping method before an important trip.
Your first attempt should not happen halfway through a multi-day hike.
Carry a Small Foot-Care Kit
You do not need an entire pharmacy.
A compact kit might include the blister-care materials you know how to use, a suitable tape or blister dressing, basic wound-cleaning supplies, and a spare pair of socks.
The exact contents depend on your trip and knowledge.
The important part is accessibility.
If your blister supplies are buried beneath everything in your backpack, you are more likely to postpone dealing with the hot spot.
Know How Your Supplies Work Before You Need Them
You bought specialized blister tape.
Great.
Have you ever used it?
Does it stick to your skin?
How should the corners be cut?
Does it stay attached when your foot sweats?
Can you remove it without damaging irritated skin?
The trail is not an ideal place to read packaging instructions for the first time.
Practice basic foot care at home.
Simple familiarity reduces mistakes when you are tired.
Do Not Automatically Pop Every Blister
A blister appears.
The immediate instinct may be to drain it.
But an intact blister roof provides protection to the tissue underneath.
Small blisters that are not causing major problems may be better protected and monitored rather than immediately opened.
Larger or extremely painful blisters can create different considerations, particularly when continued walking is unavoidable.
If a blister is opened or ruptures, cleanliness and appropriate wound care become more important because the protective skin barrier has been compromised.
A Ruptured Blister Is Now a Wound
Once the skin is open, stop treating the problem as merely annoying friction.
Keep the area as clean as practical.
Protect it from further contamination and rubbing.
Monitor it.
If you develop increasing redness, warmth, swelling, drainage, worsening pain, or other signs suggesting infection, seek appropriate medical care.
Remote trips make minor wounds more complicated because dirt, sweat, and continued walking are difficult to avoid.
Prevention remains much easier.
Do Not Rip the Skin Off Just Because It Looks Ugly
When a blister breaks, loose skin may look like something that should immediately be removed.
But the remaining skin can still protect the sensitive tissue underneath.
Do not casually tear it away on the trail.
Protect the area and manage it carefully.
If damaged tissue eventually needs trimming, cleanliness matters.
The objective is healing, not making the blister look tidy.
Blister Pads Need to Reduce Pressure, Not Create More
Protective padding can help isolate a blister from direct pressure and friction.
But badly placed material can become another lump inside an already tight shoe.
Now the footwear presses harder against the area.
Any dressing needs to work with the available shoe volume.
After applying it, put the sock and shoe back on and evaluate the fit carefully before continuing.
Sometimes Changing Socks Is the Best First Move
You feel irritation.
Take the shoe off.
The sock is damp.
Maybe the skin is still intact.
Switching to a dry pair can immediately improve the environment around your foot.
Let the damp pair dry when practical.
On longer hikes, rotating socks can be useful for hikers whose feet sweat heavily.
It is simple, lightweight, and does not require complicated gear.
Take Advantage of Longer Breaks
Lunch stop?
Shoes off.
If conditions are appropriate, let your feet breathe.
Check them.
Dry socks if needed.
Look for redness.
Remove debris.
Adjust anything that has been bothering you.
You already stopped.
Use the opportunity.
Five minutes of basic foot care can make the second half of the hike much more comfortable.
Hot Weather Can Be Hard on Feet
Warm conditions increase sweating.
Feet can remain damp for long periods.
Shoes may feel hotter.
Skin may soften.
For summer hiking, breathable footwear and moisture-managing socks can become especially important.
Do not assume blisters are primarily a cold-weather or heavy-boot problem.
Light footwear can create blisters too if fit, moisture, and movement are poorly managed.
Rain Creates a Different Challenge
Sometimes keeping feet completely dry becomes unrealistic.
Hours of rain.
Wet vegetation.
Stream crossings.
Water eventually gets inside.
At that point, your strategy may shift from:
“Never let my feet get wet.”
to:
“Manage wet feet intelligently.”
Choose equipment appropriate to expected conditions.
Reduce friction.
Use socks that function reasonably when damp.
Take opportunities to dry feet.
Watch hot spots closely.
Wet conditions make early intervention even more important.
Stream Crossings Can Create Problems Hours Later
You walk through water.
The crossing lasts thirty seconds.
Your feet remain wet for much longer.
That moisture can change how the sock and shoe interact with your skin.
If your route involves repeated crossings, plan for them.
Appropriate footwear, sock strategy, drying opportunities, and spare socks may all matter.
Do not evaluate the crossing only by whether you managed to avoid falling.
Think about what happens to your feet afterward.
Sand Can Turn Wet Feet Into Sandpaper
Beach hikes, desert washes, river routes, and sandy trails can introduce an unpleasant combination.
Moisture plus fine debris.
Sand enters the shoe.
It sticks.
Then thousands of steps grind it against the skin.
If you hike in sandy environments, keeping debris out and cleaning feet when necessary becomes especially valuable.
Tiny particles can create surprisingly significant irritation.
Long Distances Magnify Small Mistakes
A slightly imperfect sock.
Minor heel movement.
A lace that is a little too loose.
A tiny piece of debris.
None of these may matter during a twenty-minute walk.
Over several hours, repetition changes the equation.
This is why footwear should be tested over progressively longer distances.
A shoe can pass the two-mile test and fail the ten-mile test.
Distance reveals problems that short walks cannot.
Backpack Weight Can Affect Your Feet Too
A heavier pack increases the load your feet manage with every step.
It can change how strongly the foot presses into the shoe.
Long backpacking trips therefore create different demands from light day hikes.
If you are preparing for backpacking, test footwear while carrying a realistic load.
A boot that feels excellent with an empty daypack may behave differently under additional weight.
Tired Hikers Stop Paying Attention
Early in the day, you notice everything.
Later, you just want to finish.
That is when people ignore wet socks, loose laces, debris, or a developing hot spot.
Fatigue changes decision-making.
Build foot checks into natural breaks rather than relying entirely on motivation.
If you know your feet usually become problematic after a certain distance, check them before that point.
Pain Is Information, Not a Challenge
Outdoor culture sometimes rewards pushing through discomfort.
There are moments when resilience matters.
A developing blister is usually not one of them.
Ignoring friction does not demonstrate toughness.
It allows minor tissue irritation to become a more significant injury.
Stop.
Fix what you can.
Continue when appropriate.
Smart hiking often looks less dramatic than stubborn hiking.
Do Not Let the Group Pressure You Into Ignoring It
Everyone is moving quickly.
You feel the hot spot.
You do not want to be the person who asks the group to stop.
So you stay quiet.
An hour later, your blister requires a much longer stop.
Communicate early.
A competent hiking group would rather spend a few minutes addressing a preventable problem than deal with an injured member later.
Small delays can protect the entire group’s schedule.
Turnaround Decisions Can Include Foot Problems
Not every blister requires abandoning a hike.
But sometimes foot damage becomes severe enough that continuing is a poor decision.
Consider distance remaining.
Terrain.
Weather.
Available treatment.
Pain.
Whether your walking mechanics are changing.
If you begin limping significantly, you may create additional problems in your knees, hips, or other foot.
Reaching the planned destination is not more important than returning safely.
Different Trips Require Different Footwear
The shoe you love for a dry summer trail may not be ideal for snow.
A stiff boot that works under a heavy backpack may feel excessive for a short maintained path.
Light trail runners may suit one hiker and route perfectly while providing insufficient protection for another context.
Do not search for one pair that must dominate every environment.
Think about terrain and conditions.
Familiar Footwear Is Valuable on Important Trips
Before a major hike, people often want new gear.
New backpack.
New jacket.
New boots.
But important trips are usually better places for proven equipment.
If your current footwear fits, performs well, and has enough remaining life, familiarity can be valuable.
Save experimentation for lower-consequence outings.
The best gear on an important day is often the gear you already understand.
Inspect the Inside of Your Shoes
Sometimes the problem is not your foot.
A damaged seam.
Worn lining.
Folded insole.
Debris.
Material separating inside the heel.
Run your hand carefully through the shoe.
Look for anything unusual.
Footwear changes with use.
A pair that never caused problems last year can develop internal wear that creates friction today.
Insoles Can Change Fit More Than Expected
Replacing an insole seems like a small modification.
But insoles affect volume, heel position, arch support, and how the foot sits inside the shoe.
A thicker insole can make the shoe tighter.
A different heel shape can change movement.
If you replace insoles, test the complete setup before a long hike.
Every component interacts.
Your Left and Right Foot May Not Behave the Same
Many people have slight differences between their feet.
One may be longer.
Wider.
Higher volume.
More prone to heel movement.
That means a shoe can feel perfect on one side and merely acceptable on the other.
Fit footwear to the more demanding foot.
Then use careful adjustments where appropriate rather than assuming both feet are identical.
Learn From the Location of the Blister
Where the blister appears can provide clues.
Back of heel?
Investigate heel movement and fit.
Between toes?
Look at toe crowding, moisture, and sock behavior.
Toe tips?
Check whether the foot is sliding forward.
Side of the foot?
Consider width and pressure.
Underfoot?
Look at moisture, sock folds, insoles, and repeated pressure.
Do not simply treat the blister.
Ask why it formed there.
Keep Notes After Problem Hikes
This may sound excessive until you experience the same blister three times.
Record what happened.
Which footwear?
Which socks?
Distance?
Weather?
Location of the blister?
When did the hot spot begin?
Was the foot wet?
Did different lacing help?
Patterns become obvious surprisingly quickly.
Then your prevention strategy becomes personal instead of generic.
Do Not Change Five Things at Once
You get blisters.
For the next hike you buy:
New shoes.
New socks.
New insoles.
New tape.
New lacing system.
No blister.
Great.
Which change solved it?
You have no idea.
When practical, change one major variable at a time during testing.
This helps you understand what your feet actually need.
The Best Blister Kit Is the One You Actually Use Early
You can carry every foot-care product available.
None of it matters if you refuse to stop.
The most important piece of blister prevention equipment may simply be the willingness to respond to discomfort immediately.
Gear supports the decision.
It does not make the decision for you.
Your Feet Are Part of Your Hiking Equipment
People maintain boots.
Clean backpacks.
Recharge headlamps.
Check trekking poles.
Then completely ignore their feet until something hurts.
But your feet are carrying the entire system.
Keep nails maintained.
Pay attention to recurring pressure areas.
Choose footwear carefully.
Manage moisture.
Treat skin problems appropriately.
A small amount of routine attention can prevent a disproportionately miserable trail experience.
Good Hiking Blister Prevention Becomes Almost Boring
The best outcome is uneventful.
Shoes fit.
Socks work.
Feet stay reasonably dry.
You stop once to remove a pebble.
Adjust the laces before the descent.
Change damp socks during lunch.
A hot spot begins, gets treated immediately, and disappears from your attention.
Nothing dramatic happens.
That is success.
Outdoor safety is often exactly like that.
The best decisions are the ones that prevent a story from ever becoming interesting.
Conclusion
Effective hiking blister prevention is not built around one miracle sock, one brand of boot, or one piece of tape.
It is a system.
Start with footwear that actually matches your foot shape and gives your toes appropriate room while keeping the heel reasonably secure.
Pair it with socks that fit smoothly and manage moisture.
Test the complete setup before committing to long distances.
Pay attention to lacing as your feet and terrain change.
Keep debris out.
Manage wet feet.
And above everything else, respond to hot spots immediately.
A blister rarely becomes painful because you failed to own enough hiking gear.
More often, a small warning appeared and walking continued.
That is the habit worth changing.
The next time you feel that tiny warm patch on your heel, do not negotiate with it.
Stop.
Take the shoe off.
Find the cause.
Fix what you can.
Then continue.
Five minutes beside the trail is far cheaper than spending the next five miles thinking about nothing except your feet.