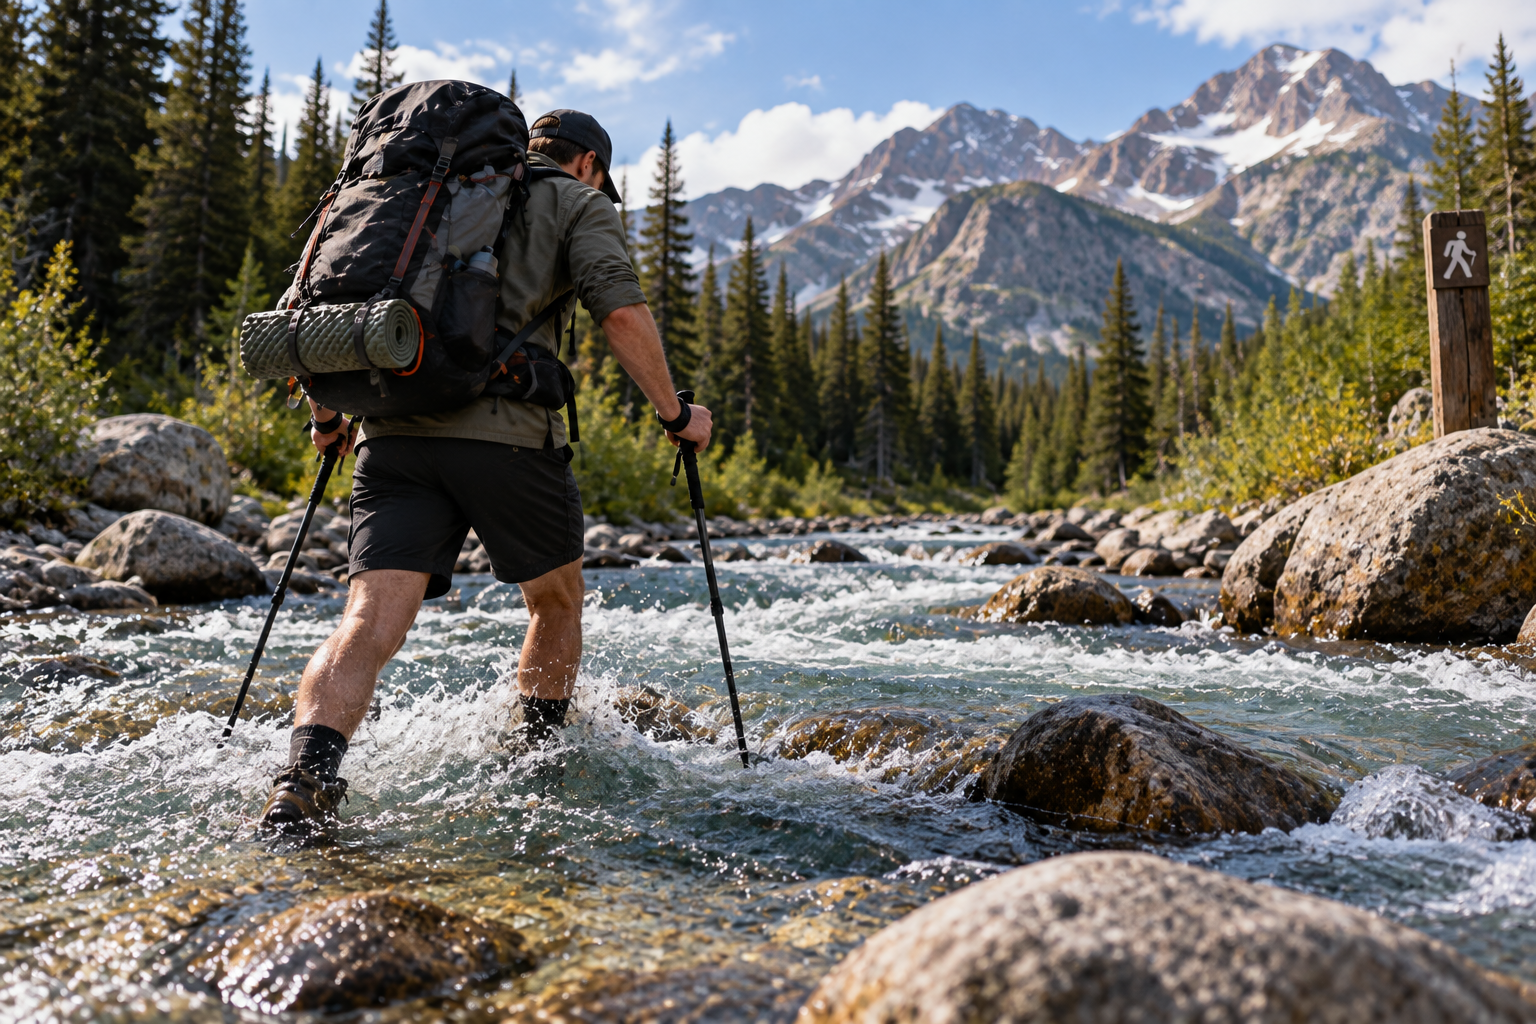
The trail is obvious on both sides.
Between them is a stream that probably looked insignificant on the map. Standing beside it, however, the situation feels very different. The water is moving faster than expected, the rocks look slippery, and it is difficult to tell how deep the channel becomes near the middle.
Other hikers may have crossed here before.
That does not automatically mean you should.
Learning how to cross a river while hiking is less about developing the courage to step into moving water and more about making a good decision before the first step. Water conditions can change quickly, and a crossing that was routine yesterday may be significantly more difficult today.
Start by Asking Whether You Need to Cross at All
The safest river crossing is sometimes the one you do not attempt.
Before entering the water, confirm that the trail genuinely continues on the opposite side and that you are at the intended crossing point. Maps, navigation tools, trail markers, and visible tracks can help provide context, but conditions on the ground still matter.
If the water appears significantly higher or faster than expected, reconsider the plan.
Turning around can feel frustrating after hiking for hours, but reaching the opposite bank is not worth creating a situation you cannot control.
Water Speed Is Easy to Underestimate
Moving water does not need to look dramatic to create substantial force.
From the bank, a stream may appear relatively calm because the surface is smooth. Once a leg enters the current, the force becomes much more obvious.
Depth compounds the problem.
As more of your body is exposed to moving water, maintaining balance becomes increasingly difficult. A shallow crossing with manageable current is fundamentally different from entering deeper water simply because the opposite bank appears close.
Do not judge a crossing by width alone.
Recent Weather Matters
The stream in front of you is influenced by what happened upstream.
Heavy rain may raise water levels even if the sky above your current location is clear. Snowmelt can also affect mountain streams, sometimes creating substantial differences in flow depending on season and time of day.
This is why familiar crossings should still be reassessed.
Knowing that you crossed the same location safely on a previous trip does not guarantee identical conditions today.
Water is not a fixed trail feature.
Look Upstream and Downstream
The point where the trail reaches the water is not necessarily the safest place to cross.
Before committing, examine the channel in both directions where doing so is safe and practical.
You may find a wider section with shallower water, a more stable bottom, or easier access to the opposite bank.
A narrow channel can look attractive because the distance is shorter, but narrow water can also be faster or deeper.
The shortest crossing is not automatically the easiest crossing.
Study What Happens Downstream
Before entering moving water, consider where you would go if you lost your footing.
This is one of the most important parts of evaluating a crossing.
Look downstream for waterfalls, rapids, large rocks, fallen trees, steep banks, strainers, or other hazards that could make a fall much more dangerous.
A crossing is not evaluated only by the few meters directly in front of you.
The consequences of being swept downstream matter too.
If losing balance would immediately place you in a serious hazard, the margin for error may be too small.
Fallen Logs Are Not Automatically Safer
A tree spanning the water can look like a convenient bridge.
Sometimes it may provide a viable route, but do not assume that a log is safe simply because it reaches the opposite side.
Wet bark can be extremely slippery. A log may be rotten, unstable, narrow, angled, or positioned above hazardous water.
Falling from a log can also mean falling from greater height rather than simply losing footing in shallow water.
Evaluate the log as its own obstacle.
“Not getting my boots wet” is not a sufficient reason to choose a worse route.
Rock Hopping Has Similar Problems
A series of exposed rocks can make a stream crossing look easy.
The problem is that wet rocks may provide much less traction than they appear to from the bank.
Some can also move when weighted.
If using rocks requires long jumps, unstable landings, or committing to surfaces you have not tested, the crossing may become less controlled than simply choosing a safer shallow section.
Avoid allowing dry feet to become the primary objective.
Staying upright matters more.
Clear Water Can Still Hide Depth
Transparent water gives the impression that the bottom is easy to judge.
Refraction can make depth difficult to estimate accurately from above, while glare and surface movement can obscure details.
A channel may also deepen suddenly.
Look for changes in water behavior and color, but do not rely on visual estimation alone when uncertainty is high.
If a safe method of testing depth from the bank is available, use it before committing your body to the crossing.
The Riverbed Matters
Water depth and speed receive most of the attention, but the surface beneath your feet can determine whether you remain stable.
A firm gravel bed may offer predictable footing.
Large smooth stones can become slippery.
Loose rocks may roll.
Mud or soft sediment can make each step uncertain.
You are not simply walking through water.
You are walking across terrain you may not be able to see clearly while a current pushes against your legs.
That combination deserves caution.
Trekking Poles Can Add Stability
Trekking poles can provide additional contact points and help test the terrain ahead.
Use them deliberately rather than placing them far downstream where the current can make control difficult.
Before transferring your weight, establish stable footing and pole placement.
The goal is to maintain multiple reliable points of contact as you move.
Poles do not make an unsafe crossing safe, but in suitable conditions they can improve balance and provide information about depth and the riverbed.
Move Slowly and Deliberately
A stream is not the place to rush because your feet are cold.
Quick steps reduce the time available to test each placement and recover from movement underfoot.
Keep your movements controlled.
Establish one stable position before progressing to the next. Avoid crossing your feet over one another or making unnecessarily large steps that narrow your base of support.
Your pace should be determined by stability, not by how quickly you want to reach the opposite side.
Footwear Is Usually Better Left On
The instinct to remove boots or shoes can be strong, especially if keeping them dry seems possible.
But bare feet have little protection against sharp rocks, submerged branches, and rough surfaces.
Footwear can also provide better traction than bare skin depending on the terrain and shoe.
Wet footwear may be inconvenient.
A foot injury in the middle of a hike can be much more consequential.
Plan for the possibility that a genuine water crossing may leave footwear wet rather than sacrificing protection solely to keep shoes dry.
Secure Loose Gear Before Crossing
A crossing is already demanding enough without equipment shifting around your body.
Secure dangling straps and loose items before entering the water.
Electronics, documents, and other water-sensitive essentials should be protected appropriately.
Consider how your backpack affects balance as well.
A heavy pack raises the consequences of losing footing and can make recovery more difficult.
Equipment preparation should happen on dry ground, not halfway across the stream.
Understand the Backpack Trade-Off
Advice about backpack straps during river crossings can vary because the correct choice depends heavily on conditions, pack design, and crossing technique.
A pack can affect balance, and becoming trapped or restricted in moving water can be dangerous.
This is an area where simplistic universal rules can be misleading.
The more important principle is that hikers should understand their equipment and avoid entering water where a fall could become uncontrollable.
If a crossing requires complicated emergency planning just to make it seem acceptable, that itself may be evidence that another route is needed.
Groups Should Not Automatically Cross One After Another
If hiking with other people, do not let the first successful crossing turn into automatic permission for everyone else.
People differ in height, balance, strength, experience, footwear, and pack weight.
A crossing that feels manageable to one person may be much more difficult for another.
Evaluate the group based on its least comfortable or least capable member rather than its strongest.
The objective is getting everyone across safely, not proving that each person can duplicate the first hiker.
Keep Communication Simple
Before a group crossing, agree on the intended route.
Identify the entry and exit points and discuss obvious hazards.
Once someone is in the water, communication should remain clear and useful rather than becoming a stream of conflicting instructions from several people.
People waiting on the bank should also avoid creating pressure.
Someone who reaches the water and decides conditions feel worse than expected should be able to retreat without feeling that they have failed the group.
The Exit Matters as Much as the Entry
A gentle entry can lead to an awkward opposite bank.
Before crossing, identify exactly where you intend to leave the water.
Look for stable ground rather than a steep muddy bank, dense vegetation, or loose rocks.
The final few steps can be difficult because fatigue and cold encourage people to hurry.
A good crossing route includes both a manageable approach and a manageable exit.
Do not solve only the middle of the river.
Cold Water Changes the Situation
Water temperature deserves attention even when the crossing is not particularly deep.
Very cold water can quickly create discomfort and affect coordination.
Long exposure is therefore different from briefly stepping through a mild stream.
Consider the season, elevation, weather, crossing length, and what happens after reaching the other side.
If clothing or footwear becomes wet in cold conditions, you also need to think about how that affects the remainder of the hike.
The crossing is part of a larger environmental problem, not an isolated obstacle.
Never Let an Itinerary Force the Decision
“We have to cross because the campsite is on the other side.”
“We already walked too far to turn around.”
“We need to get back to the car tonight.”
These pressures are real, but they do not reduce the force of moving water.
In fact, time pressure can make judgment worse.
A route plan should always leave room for conditions to override the original itinerary.
Outdoor decisions become dangerous when the schedule is treated as more important than the environment.
Other Footprints Are Not Proof of Safety
Tracks entering and leaving the water can be reassuring.
They show that someone crossed at some point.
They do not tell you when.
They do not reveal the person’s experience, body size, equipment, or whether the crossing was actually safe.
Most importantly, they do not tell you what the water level was at that time.
Use evidence from other hikers as information, not permission.
You still need to evaluate current conditions yourself.
Turn Around Before You Feel Trapped
A common psychological problem is commitment.
Once someone has walked halfway into a difficult situation, retreat begins to feel like failure.
That can encourage another step, then another, even as conditions become worse.
Set limits before entering.
If the depth increases beyond what you expected, the current feels substantially stronger, or footing becomes unreliable, retreat while you still have a controlled route back.
A successful hiking decision does not require reaching the opposite bank.
Sometimes success is recognizing early enough that you should not continue.
Reassess the Crossing on the Return Trip
If your route requires crossing the same stream later, do not assume the return will be identical.
Water levels may have changed.
Rain may have fallen upstream.
Snowmelt may have increased flow.
The light may be lower, making the riverbed more difficult to see.
Fatigue can also affect your balance and decision-making.
Every crossing deserves its own assessment, even when you stood in the same place only hours earlier.
Build Alternatives Into Route Planning
Good stream-crossing decisions begin before the hike.
When researching a route, identify major water crossings if information is available. Consider seasonal conditions and whether bridges, alternate trails, or turnaround options exist.
Knowing that a route contains an unbridged crossing changes what you prepare for.
It may affect footwear, trekking poles, waterproof storage, timing, and whether the route is appropriate under current conditions.
Preparation does not eliminate uncertainty.
It gives you more options when uncertainty appears.
Conclusion
Learning how to cross a river while hiking is not primarily about mastering a dramatic wilderness technique.
It begins with judgment.
Assess the speed and depth of the water, examine the riverbed, look for downstream hazards, consider recent weather, identify a stable exit, and search for a better crossing point when necessary. Use appropriate footwear and equipment, move deliberately, and remember that conditions can change between the outbound and return journey.
Most importantly, preserve the option to turn around.
A trail continuing on the opposite bank does not mean the river is obligated to let you reach it safely.
Sometimes the best outdoor skill is recognizing that the route can wait for another day.